
JPOSNA® Special Edition
Advances in Pediatric Orthopaedic Education and Technical Training
A Surgical Simulation Module on Pediatric Femoral Osteotomies for Orthopaedic Surgery Residents
1Department of Orthopedic Surgery, University of Minnesota, Minneapolis, MN; 2Gillette Children’s Specialty Healthcare, St. Paul, MN
Correspondence: Emmalynn J. Sigrist, DO, 200 East University Ave., St. Paul, MN 55101. E-mail: [email protected]
Received: April 12, 2022; Accepted: April 17, 2022; Published: August 15, 2022
DOI: 10.55275/JPOSNA-2022-0062
Volume 4, Number S1, August 2022
Introduction
Based on the descriptions of the utility of surgical simulation in resident training by multiple authors1–5 we developed a six-module pediatric orthopaedic surgical simulation program in November of 2012. Our goals were to enhance orthopaedic resident education through active learning, address essential requirements by the Accreditation Council for Graduate Medical Education (ACGME), and prepare for anticipated mandates by the American Board of Orthopaedic Surgery. We strove to diminish the patient’s burden in the achievement of surgical competence and to reduce the level of trainee stress in learning complex skills.
The content for each of the six modules was established based on appropriate subject matter for second-year residents on their first pediatric orthopaedic rotation. Specific topics were chosen with respect to frequency, complexity, or a combination of these. For example, closed reduction with percutaneous pin fixation of supracondylar humerus fractures was selected because it is a frequent childhood injury with a moderate technical skill requirement for competency. By contrast, fixation of femur fractures in children was elected because, although the occurrence of this fracture is infrequent, its treatment is more demanding from a technical standpoint. In addition to these two simulations, our modules also included femoral osteotomies, external fixation of the femur and tibia, percutaneous pinning of slipped capital femoral epiphysis, and pelvic osteotomies.
The simulations typically occur once a month in our dedicated simulation center over 2-3 hours. A one-hour lecture on the topic is provided at a morning didactic session prior to the event. Residents are emailed a required reading list. Some of the modules have a pretest to aid in focused preparation. The session is attended by three second-year residents, one or two mid-level residents who act as assistant instructors, a rotating medical student, and one or two orthopaedic staff surgeons. In addition, the support staff includes a surgery simulation center employee, radiology technologists, and an operating room assistant. Residents are relieved of their clinical duties during these sessions.
Following the model developed by Van Heest et al.,1 we incorporate two evaluation tools: an Objective Structured Assessment of Technical Skills (OSATS) Checklist (Appendix Table A1) and a Global Rating Scale of Performance (Appendix Table A2) during and after the session to assess the trainees’ level of medical knowledge, judgment, capabilities, and technical skills. The tools were adapted from the work of other authors2,6–8 and tailored for each of our specific modules. Currently, we have the trainees complete the tools as a self-assessment.
These opportunities are possible because our institution has provided a budget and resources including a dedicated simulation center (Figure 1), surgical equipment, employed staff members, and synthetic bone models.
Figure 1. The simulation center.

The staff manage the budget, order and modify the models, set up the room, and actualize the experience. The pediatric orthopaedic site director develops the curriculum for the sessions including creation of the modified OSATS Check Lists and Global Rating Scales. Surgeons volunteer their time to present a 1-hour lecture as well as create and supervise the simulation module. In some cases, we have enlisted vendor support for necessary specialized instruments. As an underlying principle, we have tried to keep the simulations low fidelity to manage cost while still providing a sufficiently realistic experience.
Description of Simulation Exercise: Setup
At the beginning of our surgery simulation curriculum, the pediatric orthopaedic site director, the surgeons instructing each of the six topic-focused individual modules, and the simulation center staff met to discuss the plans for each module including model creation, room setup, and equipment needs. After completion of the first session for each module these meetings were brief and served to accomplish modifications to enhance the experience based on global feedback from all participants.
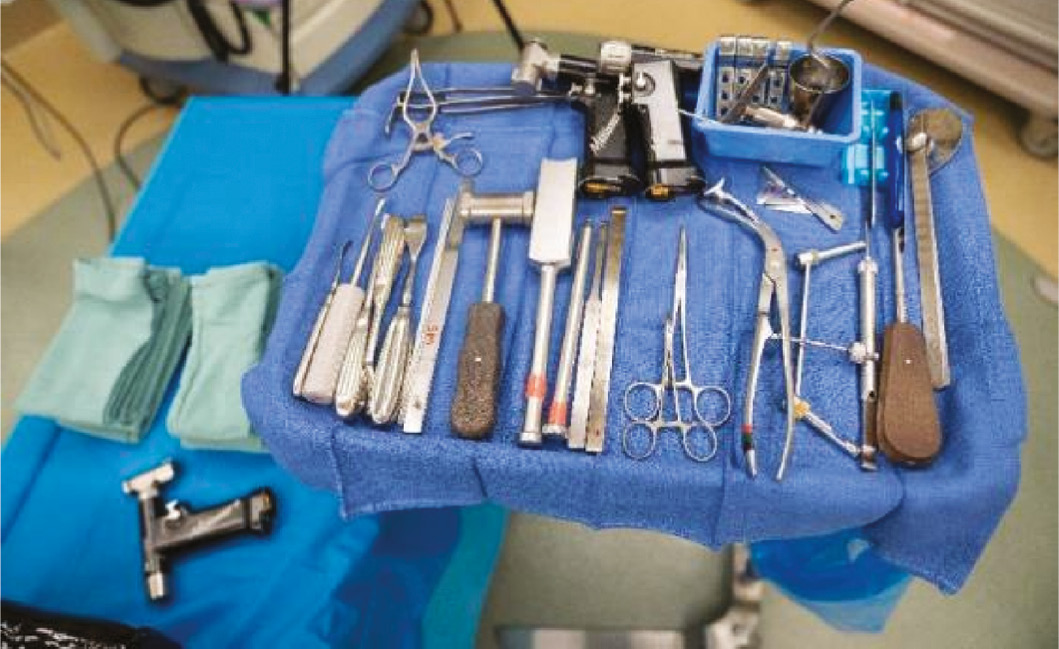
The laboratory is set up by the simulation center staff prior to the arrival of the trainees. The center can accommodate three stations. The number of stations is determined based on the anticipated attendance by trainees. Usually, two trainees work at one station with a bilateral lower extremity model affording each to act as surgeon and assistant. If the number of trainees exceeds six, then occasionally more than two trainees will be positioned at one spot. There are equipment stands and implant specific trays at each station and a back table for additional tools (Figures 2 and 3). The C-arm is shared amongst the stations with appropriate safety precautions utilized.
Figures 2 and 3. Mayo stand and back table.

The trainees have already participated in a didactic session regarding the specific procedure and its indications. They have been given several articles and links to videos on our hospital’s website or the internet. Sometimes, if an instructor prefers, they are given a multiple-choice, task-specific pretest and then the results are discussed at the didactic session. When the trainees arrive, the plan for the session is reviewed and they are then either assigned to a station or allowed to self-select their partners. If senior-level trainees are present, they may play an assistant instructor role while also having the opportunity to do the procedure themselves. In this proximal femoral osteotomy module, the models have been altered to create non-anatomic alignment with alteration of the neck shaft angle or the degree of anteversion. The trainees are warned that this is the case. At least one of the models has usually been placed in significant retroversion to challenge the learner. They are given a specific assignment such as, “The goal for this patient is for you to achieve a neck shaft angle of 110 degrees and residual anteversion of 10 degrees.” The task assigned to any given resident can be individualized to make it more straightforward or complex based on that resident’s level of learning.
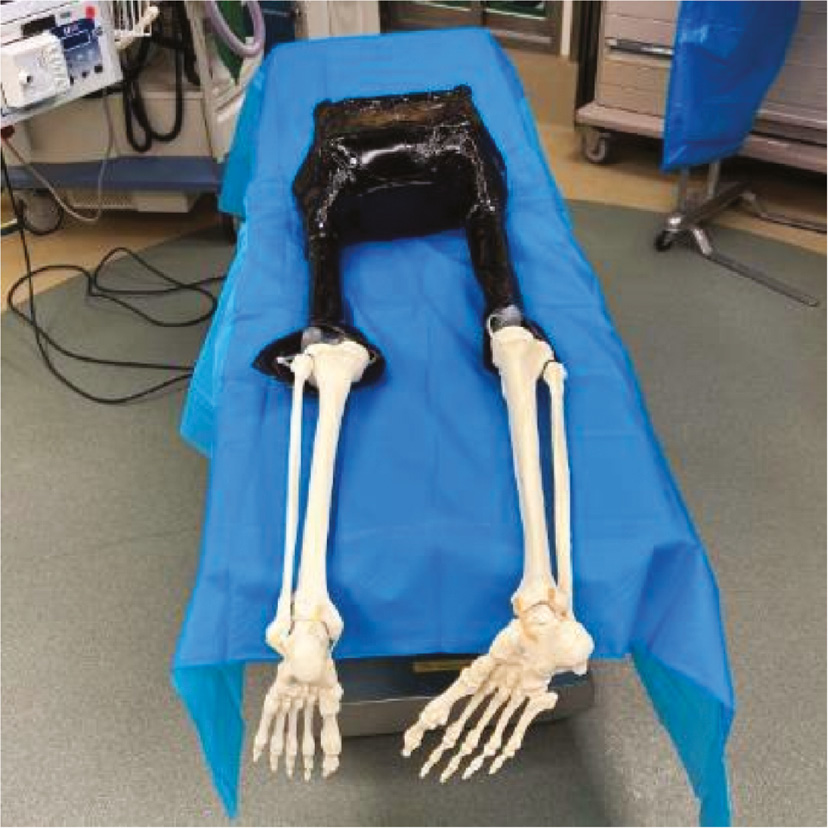
At each of the stations, the session starts with a review of the previously instructed methods of measuring alignment. At our institution, these osteotomies are often performed in the prone position, so the simulation is also done with the model prone. The models are built to include synthetic bony legs and feet to afford practice at rotational profile measurement by using the tibial shaft as a surrogate for the distal femoral condylar axis (Figure 4).
Figure 4. Prone model.

The residents are handed the OSATS Checklist and the Global Rating Scale. These guide their task and prepare them to self-evaluate at completion of the session.
The trainees then proceed with the proximal femoral osteotomies. We use blade plates as they are a basic, affordable implant. Explanted plates and decommissioned surgical tools assist with cost reduction. Other systems could certainly be used.
Once all learners have had the chance to perform an osteotomy, a debriefing is performed, and residents complete the self-assessment forms (Figure 5).
Figure 5. A resident completing evaluation tools.

In this module, if time permits, the instructor performs a distal femoral osteotomy. This allows the learner to see an experienced surgeon perform a similar procedure with the same instruments in a more skilled manner. While doing this, the instructor reinforces the learning that occurred earlier by asking and soliciting questions.
This is the same overall format for each of the surgical modules. We chose to have the individual instructors create the plans for the specific sessions and encouraged them to teach in a manner with which they are comfortable while still utilizing the overall principles of active learning. It is helpful to have more than one surgeon connected to each module so that the scheduled session happens even if a particular surgeon becomes unavailable.
Description of Simulation Exercise: Training Technique
Principles of active learning, including those for resident education as described by Luc and Antonoff9 and by faculty at the AAOS Course for Orthopaedic Educators,10 guide this curriculum. For example, we adapt the knowledge content and procedural complexity for the sessions to the individual student’s zone of development. As most of the trainees are second-year residents, this module was chosen and developed to review basic anatomy concepts, emphasize preoperative planning, increase exposure to equipment and implants, provide repeatable opportunities for performing specific skills, and improve self-awareness of surgical technical ability. For higher-level residents, participation provides the ability to learn by teaching. It is hoped that this learning is transferable to other procedures for all learners.
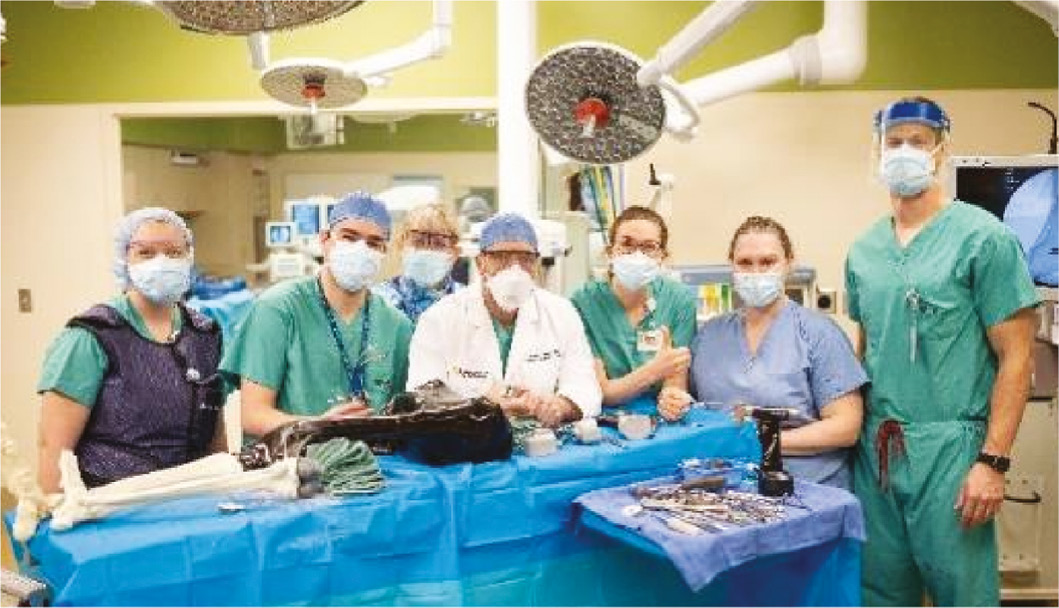
Other goals of all sessions are to foster communication and teamwork. Furthermore, surgeons have the opportunity to share and inspire passion for their art. We believe these enjoyable, interactive sessions lead to enhanced relationships between staff and learners. This interaction is presumed to translate in the future to a better operating room experience for all and most importantly, for the patient (Figure 6).
Figure 6. A simulation crew.
Active Learning Tips for Teachers for All Modules:
- Avoid over-instruction. Let the learner struggle with concepts and skills but balance this with real-time, constructive feedback for specific skills rather than allowing repetitive practice of poor technique.
- Keep the event learner-centered.
- Provide clear expectations.
- Encourage curiosity.
- Ask thought-provoking questions.
- Stick to the schedule.
- Make the experience fun.
- Apply the sandwich method of coaching, “You did that part well, you could do this differently, oh, and you performed that skill well.”
- Capitalize on trainees’ learning preferences.
- Solicit and apply improvements to the sessions.
Modifications to the curriculum and modules are made as needed. Simulation models evolve. For example, the original models were painted with radiopaque zinc-based paint. Now, they are purchased in this state to save time. Ponseti treatment of clubfeet and spine instrumentation have been added to the original modules. We added closed reduction of forearm fractures to the supracondylar humerus fracture session, as we found there was enough available time. Maintaining a consistent schedule requires attention to detail with effective communication across the residency program, some flexibility by all, and a strong commitment to the curriculum.
Summary
There have been several important components to the success of our surgical simulation program. As Karam et al.11 found in their survey, the most substantial obstacle to the adoption of skills laboratories and a surgical skills curriculum is lack of funding. Funding provided by our institution was and continues to be essential. With the vision of our chief medical officer, the support of hospital administration, and the monetary contributions of donors the surgical simulation center was planned and created as a part of a renovation project of our entire operating room floor.
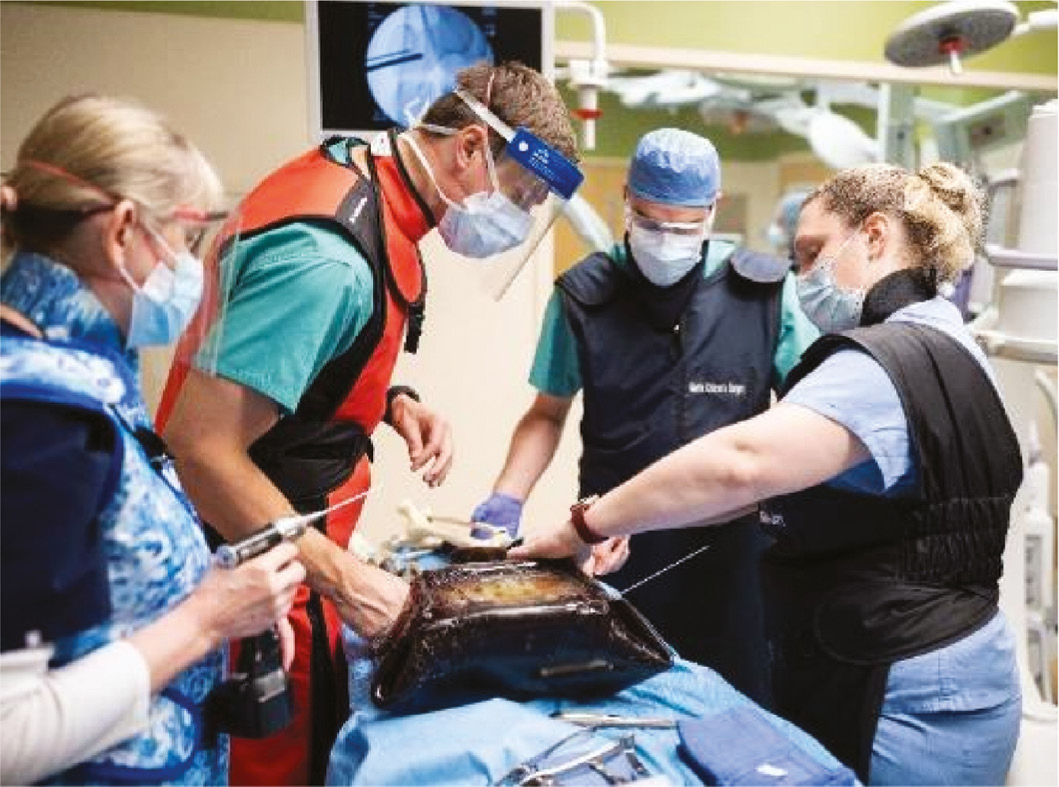
Hospital staff participate as a part of their work roles. The annual budget and designated donor gifts contribute to the expendable supplies. In some instances, vendors provide specialized equipment. Orthopaedic staff surgeons share their time, energy, and talents (Figure 7).
Figure 7. Orthopaedic staff instructors and residents.
Engagement of the residency program director, the site director, and the site coordinator has been crucial. The trainees’ enthusiasm, commitment to their education, and honest feedback have enhanced the ongoing experience.
A number of plans are in place to improve our program. First, we hope to re-establish the repeatable schedule of monthly sessions that occurred regularly prior to the pandemic. Reduced financial and personnel resources as well as our hospital’s policy for social distancing decreased the frequency of these opportunities. As we learned at the outset of the program, development of a well-communicated calendar 6 months prior to the group of sessions is important so that instructors, trainees, staff, and other resources are all available.
Second, we plan to optimize implementation of evaluation tools. Technologies, including motion capture and real-time video, are future considerations. Currently, the OSAT Checklist and the Global Rating scale are used to guide the actual performance of each simulation. The residents complete them as a self-assessment. This provides an opportunity for review and self-reflection, but the tools might be better used for formal evaluation. In order to do this, our tools must be modified.
Although similar to others’ validated versions, our OSAT Checklists and Global Rating Scales have not yet been validated. Therefore, the outcome of our program cannot be scientifically demonstrated. Gratifyingly, the benefits of these sessions and the motivation to continue holding them have been realized based on trainee feedback. Annually, our orthopaedic residency program evaluates all scheduled learning sessions. In all years except one, from 2014 to 2019, our group of simulation modules ranked first out of 30. Residents’ comments provide further endorsement: “I really enjoy the simulations and felt these were the most helpful,” and “The sim labs are excellent—probably the best-protected education time we have in residency.”
Validation of our tools may allow achievement of objectives beyond that of resident satisfaction. As outlined by Kalun et al.,12 matching surgical simulation tools to validated intraoperative assessment tools might determine whether skills are transferred from the simulation laboratory to the operating room. Better tools have the potential to assist with documentation of ABOS competency-based verification. Despite efforts to minimize costs, including use of recycled equipment, low-fidelity experiences, and efficient use of resources, these training sessions are expensive. To justify them, we need to be able to prove their worth.
From a broad perspective, research on evidence-based teaching using active learning in simulation settings has the potential to address the heightened challenges of surgical education.9 Development of a standardized curriculum of pediatric orthopaedic simulations across multiple institutions may optimize patient outcomes, enhance learner development, and allow us to be better stewards of available resources.
Acknowledgements
Special thanks to Steven E. Koop, MD; Lily Wood, MD; John Wulfing; Amanda Handt; Jamie Price; Amy Schall; the radiologic technologists; and Ben Brewer. This article is dedicated to Debra Berny who served as pediatric orthopaedic site coordinator for 20 years and made this simulation program a success!
Disclaimer
Funding provided by the generous donors of Gillette Children’s Specialty Healthcare. The authors have no conflicts of interest to report.
References
- Van Heest A, Putnam M, Agel J, et al. Assessment of technical skills of orthopaedic surgery residents performing open carpal tunnel release surgery. J Bone Joint Surg Am. 2009;91(12):2811-2817.
- Sonnadara RR, Van Vliet A, Safir O, et al. Orthopedic boot camp: examining the effectiveness of an intensive surgical skills course. Surgery. 2011;149(6):745–749.
- Seymour NE, Gallagher AG, Roman SA, et al. Virtual reality training improves operating room performance: results of a randomized, double-blinded study. Ann Surg. 2002;236(4):458-463; discussion 63-4.
- Atesok K, Mabrey JD, Jazrawi LM, et al. Surgical simulation in orthopaedic skills training. J Am Acad Orthop Surg. 2012;20(7):410-422.
- Howells NR, Auplish S, Hand GC, et al. Retention of arthroscopic shoulder skills learned with use of a simulator. Demonstration of a learning curve and loss of performance level after a time delay. J Bone Joint Surg Am. 2009;91(5):1207-1213.
- Lentz GM, Mandel LS, Goff BA. A six-year study of surgical teaching and skills evaluation for obstetric/gynecologic residents in porcine and inanimate surgical models. Am J Obstet Gynecol. 2005;193(6):2056-2061.
- Doyle JD, Webber EM, Sidhu RS. A universal global rating scale for the evaluation of technical skills in the operating room. Am J Surg. 2007;193(5):551-555; discussion 5.
- Reznick R, Regehr G, MacRae H, et al. Testing technical skill via an innovative “bench station” examination. Am J Surg. 1997;173(3):226-230.
- Luc JGY, Antonoff MB. Active learning in medical education: application to the training of surgeons. J Med Educ Curric Dev. 2016;3.
- Kern KRK. The final cut: An educational call to arms: Recovering from the impact of Covid-19. AAOSNow; 2021 March 2, 2022. Available at: https://aaos.org/aaosnow/2021/dec/commentary/commentary02/.
- Karam MD, Pedowitz RA, Natividad H, et al. Current and future use of surgical skills training laboratories in orthopaedic resident education: a national survey. J Bone Joint Surg Am. 2013;95(1):e4.
- Kalun P, Wagner N, Yan J, et al. Surgical simulation training in orthopedics: current insights. Adv Med Educ Pract. 2018;9:125-131.
Appendix
Appendix Table A1. Objective Structured Assessment of Technical Skills (OSATS) Checklist
(Modified with permission of Ranil Sonnadara, PhD, University of Toronto, Surgical Skills Centre, Toronto, ON, Canada)
Proximal Femoral Osteotomies
| Incomplete, Incorrect | Complete, Correct | |
|---|---|---|
| Preoperative Elements | ||
| 1. Prone for proximal | 0 | 1 |
| 2. C-arm from bottom for small patient. Angled from side (avoiding pedestal) for larger patient | 0 | 1 |
| 3. Safe site sign, time out, antibiotic | 0 | 1 |
| Assessment of Deformity | ||
| 4. Describe torsional measurement methods | 0 | 1 |
| 5. Able to define anatomy (anteversion, tibial torsion) and normal values (Describes exposure including length of incision and location) | 0 | 1 |
| Placement of Steinman Pin | ||
| 6. Correct size pin | 0 | 1 |
| 7. Correct entry site | 0 | 1 |
| 8. Less than 4 passes | 0 | 1 |
| 9. Acceptable final position | 0 | 1 |
| 10. Understands how to achieve AP/lateral views | 0 | 1 |
| Insertion of Chisel | ||
| 11. Knows which chisel (based on plate size) | 0 | 1 |
| 12. Correct placement (location, depth, angle, rotation) | 0 | 1 |
| 13. Disimpacts/reimpacts | 0 | 1 |
| Osteotomy | ||
| 14. Understands number and location of cuts | 0 | 1 |
| 15. Performs cuts safely | 0 | 1 |
| Fixation/Correction | ||
| 16. Removes chisel in controlled manner | 0 | 1 |
| 17. Places/impacts correct plate | 0 | 1 |
| 18. Applies Verbrugge | 0 | 1 |
| 19. Achieves correct alignment (derotation +/− other e.g., shortening, varus, flex/ext, etc. | 0 | 1 |
| 20. Drills without plunging | 0 | 1 |
| 21. Measures screw length | 0 | 1 |
| 22. Places screws (one in compression) | 0 | 1 |
| 23. Documents final result in 2 radiographic views | 0 | 1 |
| Maximum Total Score | 23 |
Trainee Name:
Trainee Signature:
Trainee Comments:
Appendix Table A2. Global Rating Scale of Performance
(Modified with permission of Ranil Sonnadara, PhD)
| Preoperative Planning | ||||
| 1 | 2 | 3 | 4 | 5 |
| Unclear about indications/goals for procedure | Good understanding about indications/goals but room for additional knowledge acquisition | Excellent familiarity with indications/goals for procedure | ||
| Time and Motion | ||||
| 1 | 2 | 3 | 4 | 5 |
| Many unnecessary movements Did not use time efficiently | Efficient but some unnecessary moves | All steps performed with economy of motion | ||
| Knowledge of Instruments | ||||
| 1 | 2 | 3 | 4 | 5 |
| Does not know names/sizes of instruments or their purpose | Knows names of most instruments and how to use them | Knows all instruments and selects proper sizes | ||
| Instrument Handling | ||||
| 1 | 2 | 3 | 4 | 5 |
| Unable to use instruments in an appropriate manner | Competent use of instruments but requires significant additional thought or appears awkward | Skilled movements In control of instruments at all times | ||
| Flow of Procedure | ||||
| 1 | 2 | 3 | 4 | 5 |
| Stops frequently or is frantic Unsure of next steps Disorganized | A little too slow or rushed but makes progress | Confident about correct sequence, plans ahead | ||
| Knowledge of Specific Procedure | ||||
| 1 | 2 | 3 | 4 | 5 |
| Requires frequent instruction about instruments, alignment, steps of procedure. Appears anxious, unsure | Knows all of the important steps, missing few details | Excellent knowledge of osteotomies and how to achieve goal | ||
| Understanding of Safety Issues | ||||
| 1 | 2 | 3 | 4 | 5 |
| Too concerned with getting through procedure to exercise safety measures | Aware of risks to patient and care providers and caution evident (e.g., x-ray exposure, sharps) | Appropriate regard for risks (radiation exposure, sharps), avoids damage to soft tissues by using instruments properly | ||
| Overall Performance | ||||
| 1 | 2 | 3 | 4 | 5 |
| Novice | Competent | Advanced | ||
Trainee Name:
Trainee Signature:
Trainee Comments:
Supplies for Femoral Osteotomy Simulation Session
General
Simulation room, which is a replica of a standard operating room
Radiolucent tables with protective drape. We do not drape the models but this could be incorporated.
C arm fluoroscope
C arm monitors
Lower extremity models
X-ray gowns
Gloves
Eye protection
Face masks (especially since the start of the pandemic)
We are unable to use biologic materials, as the simulation center is in proximity to the operating room suite and we do not have appropriate cleaning equipment.
Standard Orthopaedic Surgical Instruments Available in a Simulation Center Dedicated Pan
Arm/Navy
Chandler
Cobb elevator
Coker
Crego elevators
Drill bit set
Drills
Forceps
Freer
Goniometer
Homan
Joker
Kirschner wires
Mallet
Marking pen
Mayo
Osteotomes
Ruler
Saw blades
Scalpel
Self-retainers
Spinal needle
Spring retractors
Steinmann pins
Syringe with saline
Triangles
Implant Instrument Tray
Chisel
Tuning fork
Plate handle
Alignment guide
Verbrugge clamp
Screwdriver
Decommissioned Reusable Implants
Variety of sizes of blade plates
Variety of screw sizes and types
Involved Personnel
Orthopaedic site coordinator
Trainees
Orthopaedic staff surgeons
Simulation center staff
Operating room nurse
Radiology technologists
Housekeeping staff
Femoral Osteotomy Lower Extremity Model
Supplies for one model for this module
- Pelvis
- Femurs (Left & Right)
- Tibias and Fibulas & Feet (Left & Right)
- Zinc based gray spray paint
- Power drill/bit
- Scissors
- Oven or hot air gun
- Elastic
- Plastic washers
- Zip ties
- Gel base for pelvis
- 18” × 26” sheets of gel. One for each femur
Supplies needed for one 18” × 26” model gel covering or base for pelvis
- 16 oz can unflavored gelatin
- cups glycerin (food grade)
- cups water
- Food coloring
- cup glass measuring bowl
- cup glass measuring bowl
- Large container/mold
- 18” × 26” baking sheet
- Microwave
Instructions for Making the Model
Add 3 cups glycerin to an 8 cup measuring bowl. Add 1 (16 oz) can unflavored gelatin to glycerin, gently mix until dissolved, then add 3 cups water. Heat in microwave, stirring frequently. Once thoroughly mixed, add food coloring. Pour into a large container or mold and let dry overnight. This will help reduce the amount of air bubbles in the final mold. After completely cooled, mold can be covered and stored until needed. Cut into pieces, place in an 8 cup bowl, and melt in microwave. Pour into 18” × 26” baking sheet. (Appendix Figure A1). Let dry.
Appendix Figure A1. Gel in baking sheet.

Drill small hole through acetabulum, femur head, distal femur, and proximal tib/fib. Paint pelvis and femurs with zinc-based paint. To mount and stabilize pelvis, place pelvis in container, and pour gel mixture into container. Let dry overnight. Heat femurs in oven or with a hot air gun. Once heated, bone can be twisted to desired degree.
Cut 18” × 26” gel sheet into 3 equal parts. Using small amount of gel melted in small bowl as “glue,” paint one small gel sheet and femur with gel. Wrap femur in small gel sheet and let dry (Appendix Figure A2). Repeat using 2nd gel sheet and 2nd femur. Using melted gel, glue 3rd gel sheet to center of pelvis.
Appendix Figure A2. Gel sheet wrap of femur.

Attach femurs to acetabulum using elastic and plastic washers. Cover pelvis (with attached femurs) using full 18” × 26” gel sheet. Use melted gel as glue to hold in place. Allow to dry. Attach leg using zip ties (Appendix Figure A3).
Appendix Figure A3. Completed model.
Cost of Supplies
Lower Extremity Model Sawbones® Parts
| Part | Cost of Radiopaque in $ | SKU | Cost of nonradiopaque in $ | SKU |
| Pelvis, full male | 172.50 | 130-96 | 54 | 1301 |
| Femur, right, med. | 30.25 | 1121-20-5 | 17.50 | 113-100 |
| Femur, left, med | 31.25 | 1121-69 | 17.50 | 1130 |
| Foot + ankle, left | 73.50 | 1132-3 | ||
| Foot + ankle, right | 73.50 | 1132-65 |
Bony parts purchased from Sawbones.com®, 10221 SW 188th St., Vashon Island, WA 98070.
Following the session, the pelvis and tibias are reclaimed and reused. Approximately 50% of the gel on the femurs can be reclaimed and reused. The gelatin materials for one model cost approximately $46. If zinc-based paint is used, the content for the zinc must be >93%. The pre-painted models are better quality but more costly.
Recipe for modification of models created by John Wulfing, Simulations Operations, Gillette Children’s Specialty Healthcare. For further information, contact [email protected]